Some tips for Alignment and Posture in Asanas
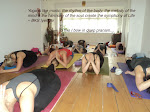
Since I am starting to go through various yoga postures (asana), I thought it would be a good idea to give you some tips about alignment, so that you become more aware of your body. Alignment is used to describe the positioning of the body for each posture in yoga. Remember everyone is different so it’s about using these tips for your individual make-up, how you feel in a posture and of course observe your whole posture and piece all the adjustments together to create the asana.
"The posture becomes perfect when the effort of achieving it vanishes" Yogabhashya
Alignment in the various asana has different purposes:
• to ensure that the postures are practiced in a way that maximizes the benefit of the posture including improvements of more flexibility, strength, tone and radiant health, whilst minimizes the risk of injury
• to ensure that the postures are practiced to allow the flow of prana (energy) in the body.
• to help calm the mind, improve focus, concentration, stability and lift the spirit.
• to position the muscles, joints and limbs in a comfortable way
So as I go through these alignment pointers remember to be aware of your own body, shape and how you feel when you are in a posture. The “perfect” pose is the pose that best suits you at the moment you are practicing the pose and what you are experiencing. By aligning yourself and using these adjustments, it may mean that you need to come out of the posture, this is good and better to align the body and free the prana (energy) that to be deeper in a posture with no alignment of the limbs, muscles joints and tendons.
The building blocks;
1.Build the foundation first: If you think of a house the foundations are essential to keep the house erect. So it is essential to pay attention to establishing a confident, stable foundation from which your asana evolves and grows. Whether that is your feet in (standing postures), your sitting bones (in seated postures) or your hands (in arm balances). Once you build your foundation, then you are able to look at the detail of the particular asana.
2.Finding your centre with stability and ease: All yoga postures should be practiced in a way which aims to balance steadiness with ease. Asana means steady pose in Sanskrit and yoga means union, union of body and mind, so the pose should be steady and comfortable so this union occurs. If it is uncomfortable, ease out of the posture a little to see how the body and mind reacts and observe this.
3.Balance your feet: For your standing postures, ground your feet into the floor, lift your toes up and spread all the toes so the weight is evenly distributed between the toes, balls of the feet and the heels. Try to distribute your weight evenly across all three points and (in most standing postures) evenly between both feet.
4.Find your seat: For seated postures, lift the flesh from your buttocks to expose the sitting bones, maybe sit on the edge of a block so that your pelvis tilts slightly forward, bringing the base of the spine on top of the pelvic girdle.
5.Strengthen the arms: For arm balances bring the hands pointing forward, the wrists in line underneath the elbows and shoulders – do you get the idea?
Let’s now works upward through the body;
6.Toes: In general, when standing and sitting with one or more legs extended out, ensure that your feet are parallel to each other. For many there is a tendency to turn our toes out when standing (– this main mean your hips are out of alignment and you need to see a chiropractor), this in practice means focusing on turning the toes inwards slightly. Aligning the feet in this way ensures that your knees are in the same alignment as your feet and the legs are active and this protects our lower back. The latter is particularly important when bending forwards or backwards.
7.Knees: The knee joint has limited rotational movement and especially when standing or lunging, so it is important that the knee points in the same direction as the foot of the same leg and does not twist inwards or outwards. It is also important in standing postures like the Warrior postures, to ensure that the knee does not move forward of the line of the heel and to actively keep the knee in line with the foot, so actively using the thighs and keeping the outside of the knee in line with the little toe. The exception to this is lunging with the back knee on the floor for Crescent Moon pose, Anjanasana, where the knee can come over the line of the heel if it is comfortable. In postures such as Standing Forward Bend, Uttanasana and Downward Facing Dog, Adho Mukha Svanasana, the alignment is achieved by keeping your feet about as wide apart as your hips. Finally, the knee should not lock, or hyper-extend, consciously maintain a softness, rather than simply pulling the kneecap back. This can be achieved by engaging the thigh muscles and will avoid straining the hamstrings. Using the fronts of the thighs muscles help support he knee and the hamstring as these two muscles work in synergy.
8.Your spine: The spine has three natural curves – the lower back (lumbar spine) and neck area (cervical spine) curve into the body; the middle back (thoracic spine) curves outwards. Since everyone is individual these curvatures can be different or more emphasized, so you need to be conscious of your spine. Observe when move where your shoulders are; are the hunched up toward the ears, if so lower them, are you letting your neck go or do you lengthen through the neck, is the chest open and the shoulder back, is your abdomen engaged activating your core and when you bend forward are you hinging forward to protect the lower/lumbar back and using all of the other observation mentioned before; shoulders, core, chest. All of these help support the spine which is essential in alignment for yoga.
9.Twist: The upper spine has more rotational movement due to the structure of the vertebrae, discs and joints of the spine, so for twisting posture you should focus the rotation on the middle and upper back, not the mower back. This is done by starting the twist from the core of the body. Try to turn from the navel first, then the chest, then the chest, then the shoulders, and finally the head and neck. Be aware not to lead with your head in an effort to appear deeper in the posture; allow the twist to evolve naturally with the breath. Use each inhalation to lengthen your spine upwards and tailbone downwards, creating more space between your vertebrae, and each exhalation to deepen the rotation.
10.Backbends: Your spine is designed to bend both forwards and backwards. While the lumbar spine has the least ability to rotate, it is often the easiest part of the spine to bend. In backbends, try to create space between the vertebrae as the spine lengthens. As you go into a backbend, consciously bend as evenly as possible through the whole spine, rather than just the lumbar spine. This means lengthening your upper back and your neck as you stretch your head back. Finally with backbends try not to clench your buttocks, they should be lightly engaged, but not clenched as this too will inhibit the spine’s ability to move.
11.Upside down: In inverted postures such as Shoulderstand and Headstand your stability in the posture is improved by engaging your abdominal and leg muscles. Keeping an upward movement of the leg muscles and pushing through the balls of the feet and the heels and activating your core all help with your inversion postures and balance in them.
These are all tips for alignment in your yoga practice, however you can use a lot of these tips in your everyday life to help stand tall, creating great posture and allow the energy to flow freely through the whole body. You can adjust your posture when at work, standing for a bus or train...Observe and be aware is the key.
Namaste, Michelle
Tuesday 16 March 2010
Friday 5 March 2010
Yoga Pose of the Month - Tree Posture; Vrksasana


I thought I'd introduce The Pose of the Month... Over the next coming months I will introduce a new posture to you to help enhance and deepen your Yoga practice. I'll tell you about the posture, the benefits and then how to practice the posture.
So let's begin, since we are coming into Spring I've been doing some gardening and planting seeds etc when I thought I would start off with the Tree posture - Vrksasana, since the trees will soon start to blossom and bloom...
Tree Pose - Vrksasana
The Tree Pose is a standing balancing pose. If you think about a tree, its roots provide the foundation and stability for the trunk or its body and branches, so your feet and legs are your roots and provide the support for your upper body to stand tall with strength and poise. Your feet are your foundation, so with all standing postures you need to make sure your foundation is strong, so with Tree you are standing on one leg, so it is your one-foot that you ground and build upon. Aim to achieve a grounded and firmness of a tree. Just as a tree uses it roots for stability; you ground the energy down through the foot like a tree. The challenge for some may be maintaining balance on one leg - this however improves with practice. Poor balance is often the result of a restless mind or distracted attention. The balancing postures reveal your state of mind; some days your balance is good and others it is poor, this depends on what you are going through in your life. If you are distracted and one thought is jumping to the next, the balance will be harder. Some days you are stressed and your mind is overactive and this will reflect in your yoga practice and maybe need more support, like a wall to achieve the posture like the Tree. This is ok, try not to judge yourself, but think I am a growing tree that needs a stick as a support for strength and metaphorically your stick is a wall that you can use to help your balance into the posture. As you use the wall for support this also build confidence so that you start to not hold the wall and stand tall and balanced alone in the Tree posture. Regular practice of this posture will help focus the mind, it builds calmness and stillness as you hold the posture and lengthens and strengthens the body. Regular practice of the Tree, Vrksasana improves concentration, balance and coordination. Because the weight of the entire body is balanced on one foot, the muscles of that leg are strengthened and toned as well.
As you advance in this posture and are able to remain standing for more than a few moments, try closing the eyes and maintaining your balance.
Benefits of the Tree, Vrksasana include:
· Improves sense of balance and co-ordination
· Tones and strengthens abdominal muscles and your core
· Opens hip area
· Strengthens thighs, calves, ankles, and spine
· Increases and improves concentration
· Improves focus, confidence and stillness
How to do the Tree, Vrksasana:

1. Stand with the feet together and the arms by your sides. Ground your feet into the floor, lift the toes and spread them wide to create your balancing foot of the standing balancing leg. Bend the right leg at the knee, and bring the sole of the right foot to either the calf muscles, the arch of the foot across the inside of the knee or the foot to the inside of the thigh, pushing into the groin area as pictured or to half lotus position as pictured.
2. Find you balance by focusing the eyes and the mind on something that is not moving in front of you, it is easier to start with the foot lower down the leg, if you have good balance then take the foot higher.
3. When you have your balance bring your hands into prayer position in front of your heart and keeping the focal point and balance, you can raise your arms over the head into prayer position. Hold the posture while breathing gently through the nostrils for about 5-10 breaths.
4. Lower the arms and right leg and return to the tadasana the mountain posture or standing position with feet together and arms at the sides. Pause for a few moments and repeat on the opposite leg.
I hope you enjoy practising your Tree Posture and grow and strengthen from your inner being.
Om shanti, Michelle
http://www.yogarelax.co.uk
Subscribe to:
Posts (Atom)